Well here we go with the pencil skirt. Again this is from her first book Gertie's Book for Better Sewing. This skirt has a slightly unique waistband. Most pencil skirts either have no waistband or they have a 1"-2" straight band. However this skirt has a asymmetrical band because the front is wider than the back.
First step: Trace the pattern. All Gertie books come with patterns for all the items in the book. They are maybe 20 pound paper patterns with, as you can see, a LOT of overlap with the different pieces. All of the pattern pages are also printed double sided so you truly need tracing paper. My first attempt I had butcher paper, because it was free, and I tried to use a sewing spur wheel to press through the pattern onto my butcher paper. While it didn't destroy my pattern pieces it wasn't the best option.
I have an L shaped desk in my sewing room and, as you can see, a roll of tissue paper mounted to the wall making it the best thing ever for tracing patterns. I purchased medical office paper to use for this. It is really pretty inexpensive and perfection for what I want to use it for. I mounted it on an inexpensive towel bar purchased from Wal-Mart. I got 21" paper and a 24" towel rod which actually is too tight, so I have to help it unroll, but it also means that it can't get unrolled accidentally.
It is super easy to just trace the lines and very important to make all the notations on your pieces. Grainline, notch locations, button hole locations and most importantly DO NOT forget to write what the pattern piece is for and what size you were cutting.
Like I said in the last post I had already used the pencil skirt in another design, so I had those two piece traced and marked up already. However I didn't have the waistband, so that was all I had to trace for this skirt.
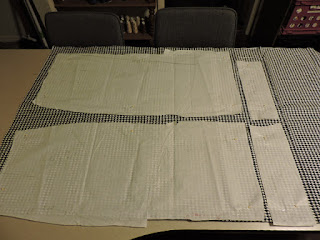
I have a small collection of fabric, and I am a sucker for hounds tooth, so I pulled this out to use for this skirt, because YAS! Hounds tooth pencil skirt makes my heart happy. I say it is a small collection because my sewing friends have much larger than myself, so I am lacking in my fabric hoarding status.
After laying out all my pieces it was time to cut. I have a singular front piece cut on the fold and two pieces for the back. The waistband has two for the front cut on the fold with one piece of interfacing and four pieces for the back of the waistband with two pieces of interfacing.
The next step will be starting to sew. Gotta say sharing sewing with all three of my stalkers is very cathartic for me.


